Each campaign type has its own set of customization options and requirements, but there are basic settings shared between all types: Name, Timeframe and Trigger.
This article shows you the right way to make these configurations after adding a new campaign. The campaign assistant launches as soon as you select a campaign type.
1. Enter a name and Description
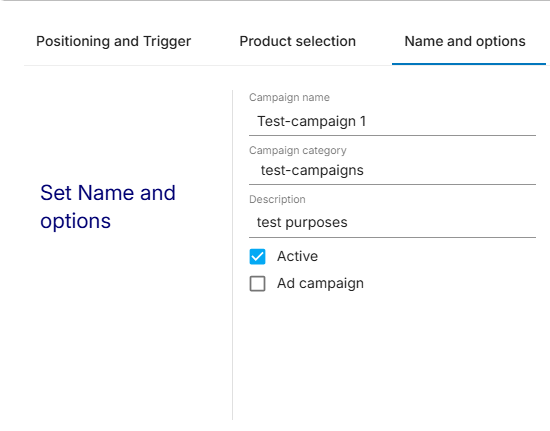
There are no fixed rules for naming campaigns, but it does make sense to coordinate group names within the team. That way, campaigns can still be easily identified after longer periods of time. Once you are done, click Next.
FactFinder can integrate some campaign types into suggest automatically. Of course, this is only possible if the campaigns have been categorized correctly.
2. Choose Period and Timeframe
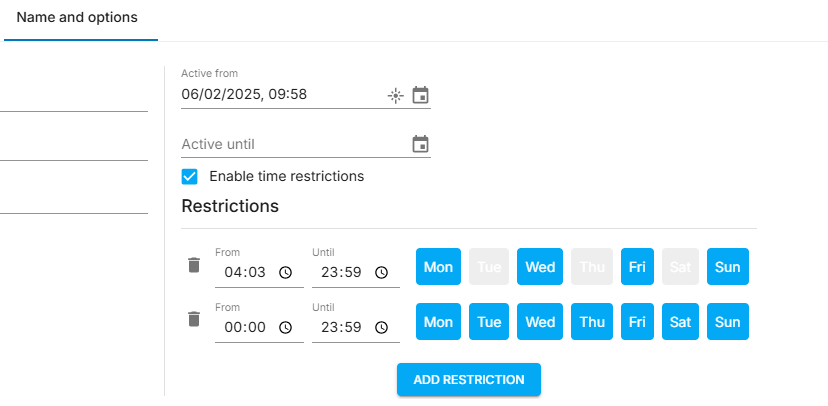
Now choose when the campaign should be active. Mostly, this would be permanently (especially for Redirect Campaings and Feedbackcampaigns). Then click Next.
Limit Timeframe
If you want a limited campaign, click Limited Period and select a start and end point. This can be either a day, or a specific time. Limited campaigns are useful, for example, for monthly specials.
You can add multiple periods, FactFinder differentiates up to minute intervals. To delete a phase, click the bin icon.
3. Choose a Trigger and one or more Conditions

This step decides what triggers the campaign to go live. You define:
The Trigger (4): Is the campaign triggered by search queries (search result), navigation within the shop (navigation result), or both?
One or more trigger-specific conditions (5): Is the campaign triggered with a specific search term, a certain number of pages, etc?
Depending on the selected trigger, you can choose from several conditions. Learn more about the topic at Name, Timeframe, Trigger - Configuring Campaigns in the next article.
Product campaigns have their own triggers and exclusive conditions. Learn more in the Trigger Conditions - Configuring Campaigns and the overview of campaign trigger conditions.
Add Conditions
Additional criteria can be added by clicking the AND/OR button. Superfluous ones can be deleted by clicking trash bin button.
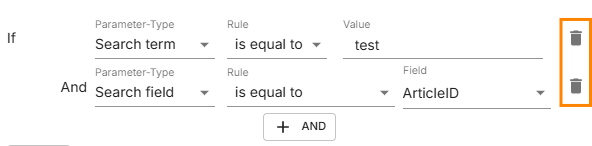
Conditions can be linked with AND or OR. You can add a lot more than just two conditions, if you want the campaign to react to a multitude of search terms. In that case, link conditions with "or".
Define Operator
.png)
Choose an operator which decides how to deal with the condition to the left of it.
The available operators change depending on the chosen condition. For example, the search term condition allows for "equal", "similar", "contains" and "does not contain" operators. With a numbers-based condition (page number, number of results, etc.), the operators "equal" "not equal", "greater", "less", etc. are available.
4. Additional campaign-specific Steps
All further steps are campaign specific. Click the campaign type you chose during Adding Campaigns.