Use the Blacklist to remove terms from your Suggest.
This article teaches you how to add new entries to the blacklist and how to configure them.
If a Blacklist entry conflicts with a Whitelist entry, Blacklist supersedes Whitelist.
1. Go to the Blacklist Menu
.png)
To access the functionality, please navigate More settings… → Suggest → Blacklist tab.
2. Enter Edit Mode
.png)
Choose a channel and click Edit Configuration to enable customization.
3. Configure a new Entry
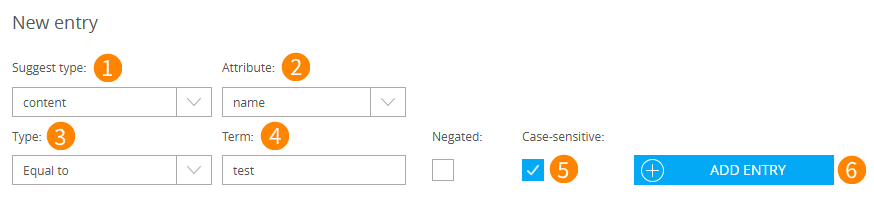
Decide how the Blacklist entry should work:
(1) Suggest type: define kind of data that will be affected:
[All]
brand
category
productName
searchTerm
content
(2) Attribute: define kind of attribute, e.g. name, image or HitCount. Available options would depend on Suggest type value.
(3) Choose a Type do apply to the Term (4) on the right:
Equal to: The entry is identical to the search term. Example: Equal to: bag; suggestions for "handbag" will still appear.
Contains: Search queries containing the term will not generate suggestions. Example: Contains: bag; suggestions for "handbag" will not appear.
Begins with: Search queries beginning with this will not result in suggestions. Example: Begins with: son; no suggestions for Sony.
Ends with: Search queries ending with the term generate no suggestions. Example: Ends with: cap; no suggestions for "hubcap".
Matches
(5) Decide whether the entry should be treated as case-sensitive.
You can not create Blacklist entries with the type product recommendations and the hitcount condition.
Click Add Entry (6) to add the entry to the overview.
a. Edit existing Entries (optional)
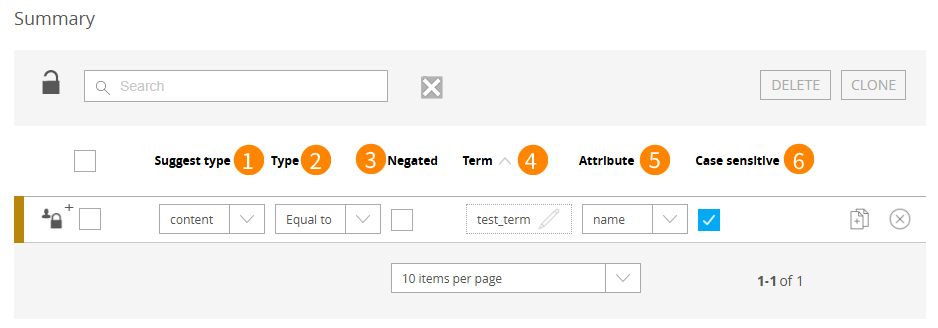
If needed, existing entries can also be modified in the overview. You can change Suggest type (1) option, Type (2) option, Attribute (5) option values from droplists, and edit Term (4) value as a text input. Negated (3) and Case sensitive (4) are editable as checkboxes.
b. Clone & Delete Entries (optional)
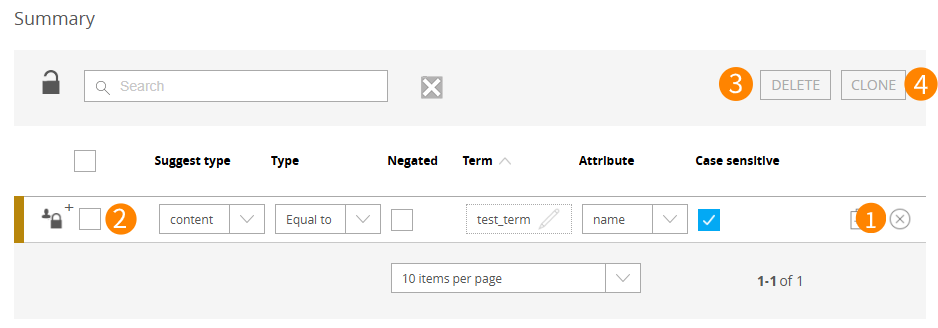
To delete a single entry, click the icon (1) and confirm the operation in the pop-up.
To delete multiple entries, select them via the checkboxes (2) and click the Delete button (3).
To clone entries, select them via the checkboxes (2) and click the Clone (4) button.
5. Click "Save"
![]()
Select Confirm button on the left to save changes made and close transaction. Confirmation is required.
Backup comment adding would be prompted, to ease the identification of the backup later.
Select Revert button on the right to revert changes made and close transaction. Confirmation is required.