Objective of AI Guided Selling
The AI Guided Selling feature is designed to enhance the online shopping experience by providing interactive, AI-powered product recommendations. It guides customers through a structured decision-making process, helping them find the most suitable product based on their needs and preferences. The main goal is to reduce decision fatigue, improve conversion rates, and enhance customer satisfaction by offering personalized and intuitive product discovery.
How to Create an AI Guided Selling Campaign
This guide will walk you through the process of setting up an AI-powered guided selling (AIGS) campaign in FF.
1. Access the AI Guided Selling Module
Log in to your FactFinder dashboard.
Click the AI Guided Selling button in the header. (This button is persistent across most pages, allowing you to access the module from anywhere.)
.png)

Note: If you don’t see the AI Guided Selling module, check with your CSM to ensure it’s enabled for your account.
2. Generate a Campaign
Click the AI Guided Selling button in the header.
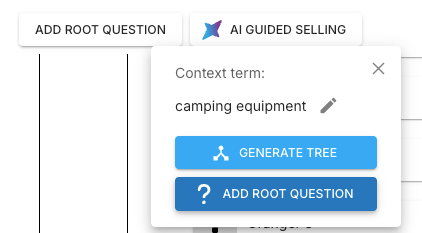
A pop-up window will appear:
.png)
Type a search term into the input field, for example: camping equipment
Please note: This will trigger a real search, so it's best to use terms that are likely to return useful results. Avoid overly specific or uncommon terms that might yield little to no results..png)


Click the Generate Campaign button to proceed.
3. Campaign Generation
After clicking the Generate Campaign button, the pop-up will close.
A notification will appear at the bottom right corner of the page, confirming that the AI Guided Selling campaign is being generated:

The process may take some time, and you will receive a notification once it is complete.
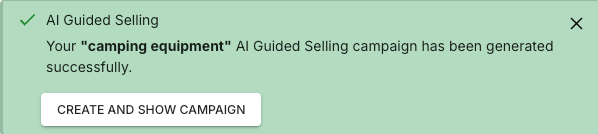
Once the AI Guided Selling campaign is successfully generated, a new notification will appear at the bottom right of the page. The notification will confirm the campaign name (e.g., "camping equipment") and provide a button labeled Create and Show Campaign:
By clicking on the Create and Show Campaign button, a new window will appear displaying your Advisor campaign settings. In the Positioning and Trigger tab, you’ll see the search term you entered earlier (e.g., “camping equipment”) automatically filled in:
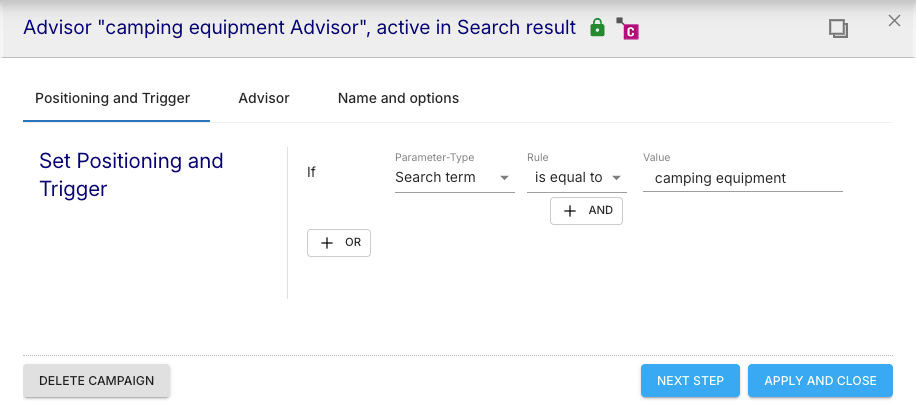


Click the Advisor tab or the Next Step button to view your AI-generated question-and-answer tree.
4. Review the AI-Generated Advisor Tree
This tree is automatically created based on the search term you provided earlier (e.g., “camping equipment”) and the product data (filters, facets, etc) available in your catalog:
.png)

Each time you generate a campaign using the same search term, the AI will create a new, unique advisor tree. This means you’re not locked into a single version - if the tree doesn't fit your needs, you can simply go back and follow the same steps from the beginning to generate a fresh one.
5. Customize the AI-Generated Advisor Tree
Once your AI-generated advisor tree is visible, you can fine-tune it to match your specific customer journey and product strategy. Here's what you can do:
➕ Add a New Root Question
You can start a completely new question path (separate from the existing one):
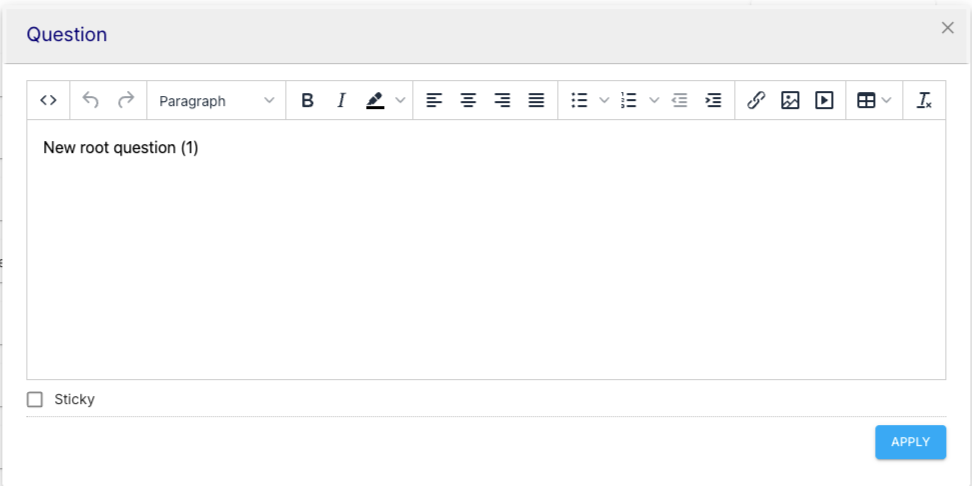
Manually: Click the Add Root Question button
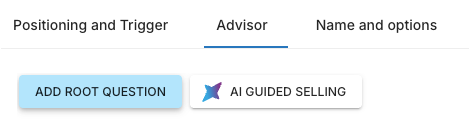

and type your question:

With AI: Click the AI Guided Selling button to generate a new root question based on your product data:


➕ Add a New question to the existing path
Expand existing tree by adding more questions:
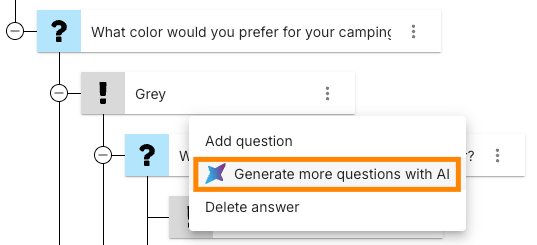
Manually: Click the three-dot menu on a answer node and select Add question:

With AI: Use the Generate more questions with AI button to let the system generate relevant questions:


➕ Add New Answers
Expand existing questions by adding more answer options:
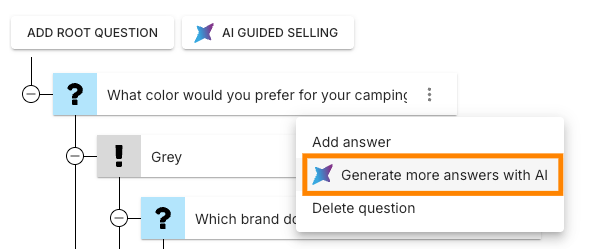
Manually: Click the three-dot menu on a question node and select Add answer:
With AI: Use the Generate more answers with AI button to let the system generate additional answers:

✏️ Rename Questions or Answers
Click directly on any question or answer to rename it:

Here you can also add a picture if needed for a visual attraction.
🔀 Rearrange with Drag and Drop
Reorder questions or answers by dragging and dropping them into the desired position. This lets you control the flow of the conversation and prioritize key questions.
🗑️ Delete Unnecessary Nodes
Remove irrelevant or duplicate questions and answers by clicking the three-dot menu and selecting Delete:


6. Review and Adjust Product Recommendations
Each answer in your advisor tree is automatically linked to a dynamic list of product recommendations. In our example, it displays 12 attached products, based on the customer’s default hitsPerPage value.
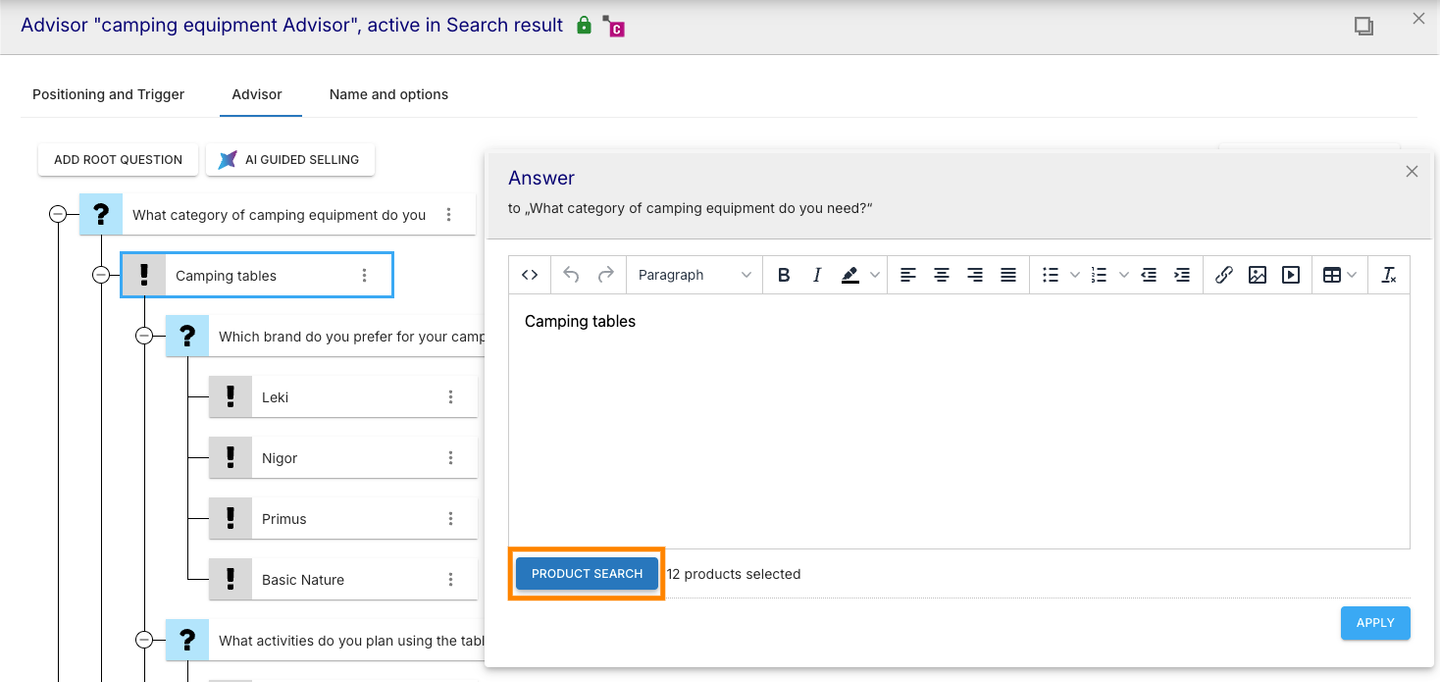

Clicking on the Product Search button within an answer opens the product selection view, where you can review and adjust which products are shown when this answer is selected:
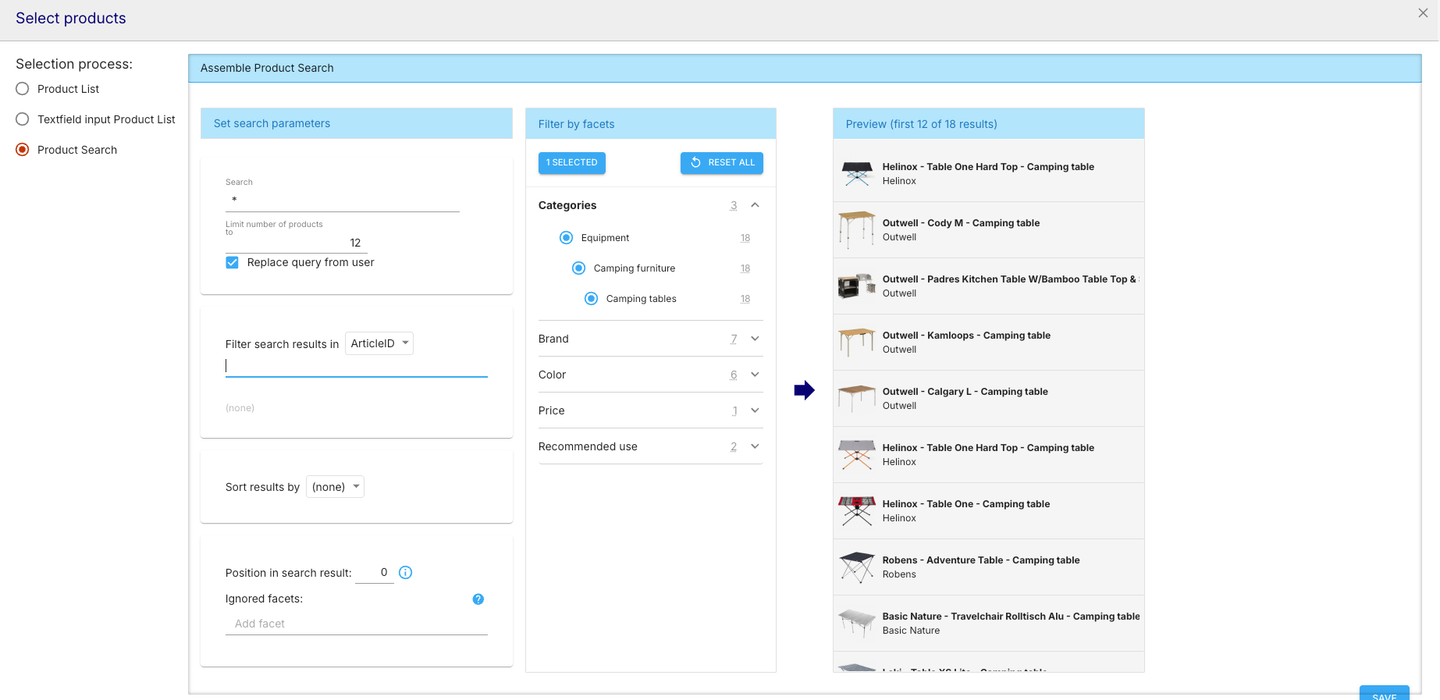

From this screen, you can:
Select how products are assigned:
Choose between Product List, Text-field input, or Product Search (default with filters).Limit results:
Set a max number of displayed products (e.g., 12).Control the search query:
Choose whether to replace the user’s original search term.Apply filters:
Refine results by Category, Brand, Color, Price, or Recommended use.Sort products:
Define the sorting method (e.g., by relevance or price).Preview results:
See a live preview of the products linked to the selected answer.
Once you're satisfied with the product selection and filters for each answer, click Apply to save your changes.
Now that your advisor tree and product recommendations are set up, you can move on to the final campaign settings such as activation dates and visibility options.
7. Finalize Campaign Settings
In the Name and options tab, set your campaign details:
Name and optional description
Start and end dates (enable time restrictions if needed)
Check Active to launch the campaign.
Click Apply and Close to save and activate your campaign.
Note: In the campaign list, this campaign will appear under the AI Guided Selling group.
AI Guided Selling Settings Page
To access configuration and monitoring options for AI Guided Selling, navigate to More Settings > AI Guided Selling in the left-side menu:
.png)

This area includes two key sections:
1. General settings
This tab is allowing to manage essential system-level configurations required for AI Guided Selling to function properly such as OpenAI Token and Timeout Settings:

2. Campaigns Queue
The Campaigns Queue tab provides an overview of all AI-generated advisor trees based on submitted search queries.
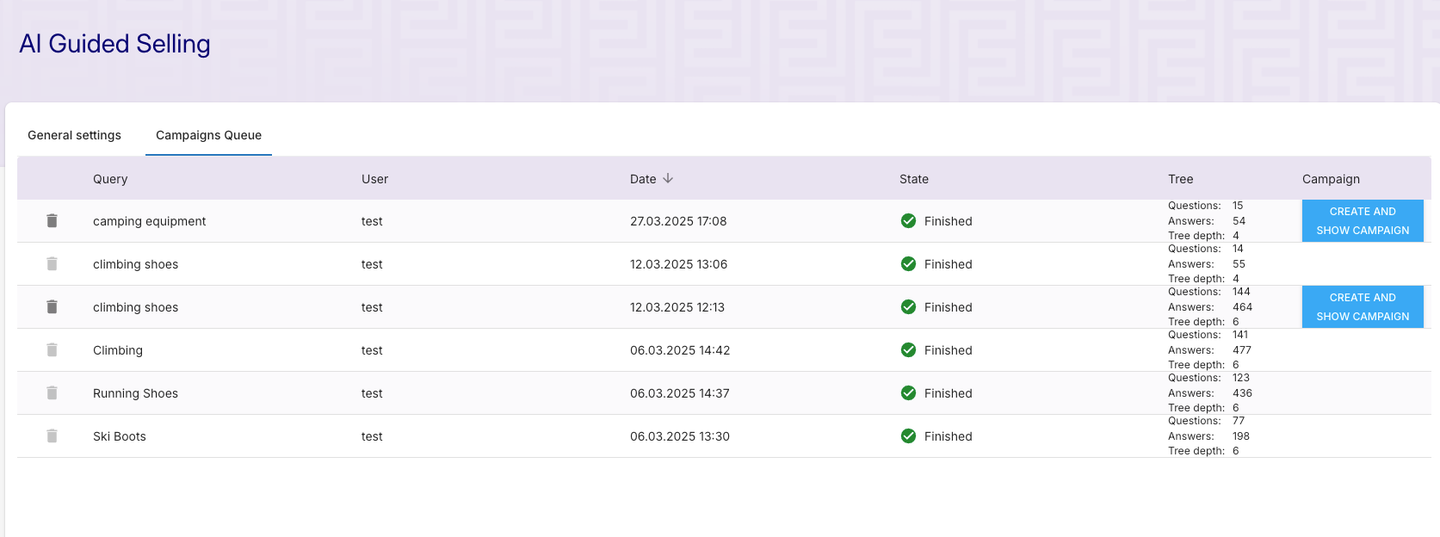

From here, you can:
Track campaign generation status:
See whether the AI tree has finished generating or is still in progress.View campaign metadata: Includes the search term, user, generation time, and structural data (e.g., number of questions, answers, and tree depth).
Preview the full advisor tree:
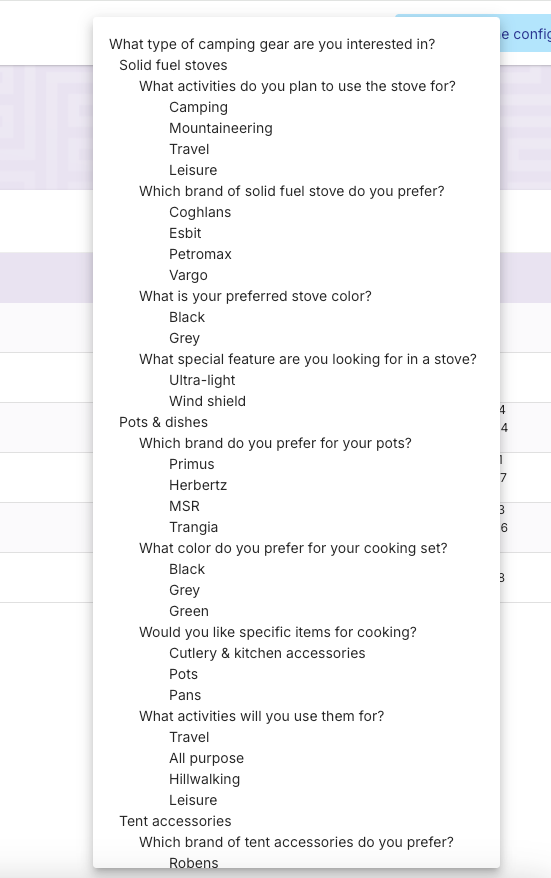
Hover or click to view the full question-and-answer structure generated for each query.Create and Show Campaign:
If a tree fits your needs, you can initiate campaign creation directly from this view by clicking the Create and Show Campaign button.
Please note: Clicking this button will remove the tree from the overview. If the campaign is not completed and saved, the tree will be permanently lost. This action is final - there is no option to review the campaign and return later without committing.Delete queued items:
Remove any outdated or unnecessary entries from the queue.

These settings allow you to ensure your AI integration is functioning correctly and give you full control over generated advisor flows before turning them into live campaigns.
If you’d like to try AI Guided Selling for yourself, reach out to your Customer Success Manager or request a demo today.